I'm used to mixing bread dough with a mixer. But recently I started baking with my brick oven again and I don't have a mixer available. Now I'm hand mixing bread dough in large plastic tubs and boy, am I ever learning a lot.
I've used home stand mixers for single loaves and big spiral mixers to mix 60 loaves at a time. But no matter what machine I used, I didn't really think too much about the mixing process. Mix on first speed until all the loose flour is off the bottom of the bowl and then mix on second speed until the gluten is properly developed.
But something changes in the baker's awareness when you're forced to really feel the dough. Your hands grow more nerve endings or something. All I know is I start to feel things at a different level. As Lionel Vatinet says in his book:
"Remember, your hands are your memory - pay attention to the feel of the dough as it comes together" - Lionel Vatinet
After mixing a few dozen batches by hand in a dough tub, there's four things I keep in mind on every mix.
- First, focus on incorporating ingredients
- Proper hydration takes time
- Knead AND Stretch And Fold
- There are two types of gluten development
First, focus on incorporating ingredients #
Most bread recipes talk about mixing on low speed until the ingredients are incorporated. But what does that mean, really?
You're looking for consistency. Not a smooth, supple dough - not yet anyway - but consistency. No lumps. No salt crystals. No super dry bits. No super wet areas.
When hand mixing, you get consistency by squeezing. Lionel Vatinet describes squeezing as making tight "OK" signs with your thumb and index fingers and squeezing and pinching your way through the dough.
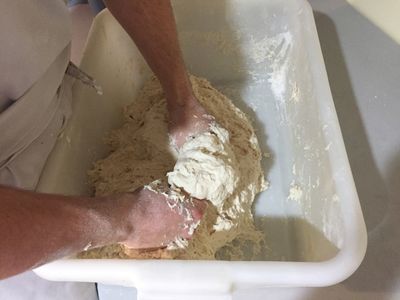
Giving the dough a series of firm squeezes to fully incorporate the ingredients
I haven't got the "OK" shape down pat yet, but I squeeze the dough all the same. Here's how I mix:
- Put the pre-scaled, warm water in the bottom of your bowl or tub.
- In a separate container, disperse the salt and yeast throughout your flour.
- Pour the flour on top of the water. I find this keeps the bottom of the mixing bowl slightly cleaner.
- With one hand, gently combine the flour and water until you have a rough, shaggy, sticky, uneven mess.
- Now get both hands in there and squeeze! Take little sections of dough and squeeze it in your hands.
- Keep grabbing bits of dry dough and squeeze it into the wet areas. Mix and squeeze, mix and squeeze.
- After a couple of minutes, the dough will still be wet and sticky, but it should be consistent. That is, there shouldn't be any dry lumps. You shouldn't be able to feel sharp salt grains when you squeeze the dough. It should all feel equally smooth (but still sticky and wet.)
At this point, clean your hands off as best you can, cover the dough and let it rest for a 20 minute autolyse. Which brings us to the next thing I learned.
Proper Hydration Takes a While #
It takes a while for the starch in the flour to become fully absorbed with water. Much longer than I have patience for.
But if you try to develop the gluten before the flour is fully hydrated, you're just making work for yourself. I imagine the starch is screaming "Just Wait A Minute!" as my dough tears and slimes up when I try to knead too soon.
That's what the autolyse* step is for. After you've got the ingredients all incorporated, give your dough a rest for 20-30 minutes. Give the starch that time to fully absorb water and let the gluten (which is already starting to form) relax a bit.
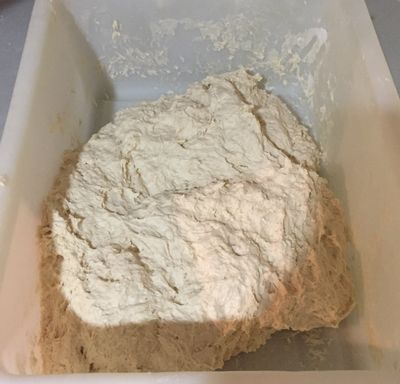
The flour,water, salt and yeast is all evenly incorporated. Now the dough needs to rest and relax.
When you come back to the bowl, the dough will already be much less sticky and will be easier to knead than when you left it.
*Note to purists: Yes, an 'autolyse' is formally defined as just flour and water, without salt or yeast being added. And, yes, the salt is hindering water absorption a bit. And, yes, fermentation is beginning because the yeast is present.
But I find adding the salt and yeast in the beginning makes it much easier to get these ingredients evenly incorporated when hand mixing. Once all the water is absorbed in the flour, I end up with icky salt and yeast pockets no matter how much I hand mix.
Knead AND Stretch and Fold #
Maybe this is only a tip for mixing larger batches. But I've found that stretching and folding alone isn't sufficient to properly develop the gluten when I hand mix bread dough.
I tend to hand mix batches that are between 10kg and 14kg (22lbs to 29lbs) which means that the 'stretch and fold' technique I share in The Learning Loaf is tough to pull off. Well, I can't anyway. Not only is the dough tough to lift in one motion, my table tends to move all over the place. So I've modified my technique somewhat.
I start by giving the dough a bunch of folds right in the tub. Just pick up a corner of dough, stretch as best you can, fold it over itself, then punch it down. Grab another corner and repeat. And repeat. And repeat.
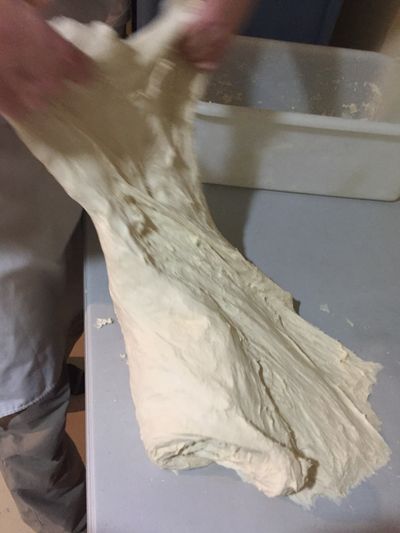
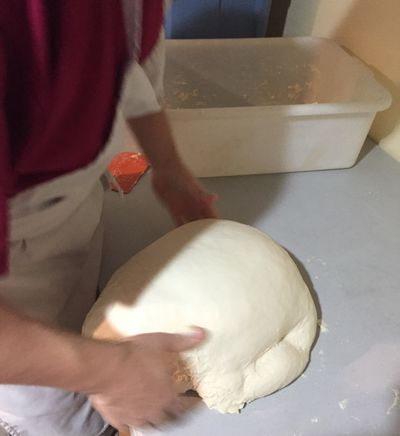
After the dough has relaxed for 20 minutes, it will take a big stretch. It only takes one or two of these before the dough begins to tighten again.
After a few of these, the dough will begin to tighten up. It won't want to stretch so much any more. At this point, I'll turn the dough out onto my bench and give it the same stretch and fold / knead treatment until the dough is really tight.
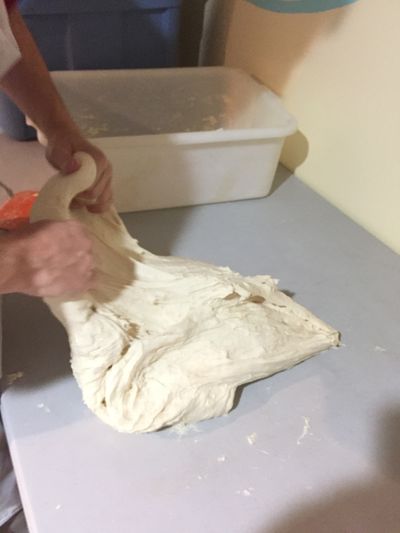
Later stretches aren't as big, as the dough tightens up.
With the dough out of the bowl, give your bowl a good scrape down to get any dry bits out of there. Then spray the bowl with pan spray. Roll your dough ball over, round it as best as you can, an place it back in the bowl. Cover and let rest for 20-30 minutes.
End the stretch and fold session with some firm kneading, as you shape your dough into a ball
After the rest, repeat the whole process again. Stretch and fold and punch, until the dough is tight again.
Compared to a mechanical mixer, I'm being gentler than normal in the first stage (the dough batch is too large to give a good slap down like a single loaf) but firmer than normal with each stretch and fold that follows. In the end, the gluten is properly developed.
But what do I mean by 'proper development'? Read on!
Two Types of Gluten Development #
We do all this mixing and kneading to develop the gluten in the bread dough. That's the long protein chains that trap gas from the yeast and allows the loaf of bread to rise.
Without gluten, we get a flat, heavy pancake. And without properly developed gluten, we get other, less extreme problems.
Properly developed gluten is both elastic and extensible. Elastic dough springs back when you tug on it, just like an elastic band. If your dough isn't elastic, it won't sit up big and tall.
Extensible dough means the dough will stretch out in the first place. Without extensible dough, it would be impossible to roll out a baguette to full length.
The balance between elasticity and extensibility is a key to a great loaf of bread. You want to be able to have a nice tall loaf that will hold its shape. But you also want it to be able to stretch a little without tearing.
When hand mixing large batches of bread dough, I find it's easy to create elasticity in the dough, but more difficult to create extensibility. So even though good fermentation happens and the final loaf has a good shape, the crumb isn't always as light and airy as it could be. And the final loaf height isn't as tall as it could be either. In essence, the tiny gluten balloons that trap gas break before they are fully inflated.
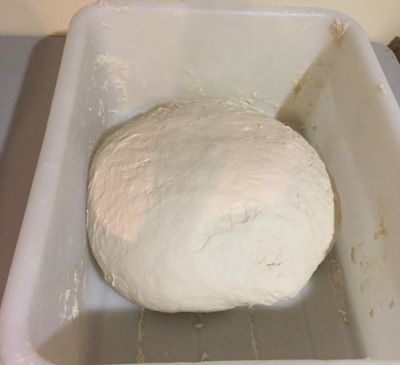
My dough after the first stretch and fold session. Notice the tears and rips on the surface. We're not done mixing yet. The dough needs to rest and relax before we repeat the process anywhere from 1 - 3 more times. Don't despair! It gets easier at each stage.
When you think about the hand mixing process, especially with large batches, this makes sense. It's easy to get in the habit of doing more folding and punching than stretching. When confronted with a large tub of sticky dough, my first urge is to make it less sticky. So I fold and punch, fold and punch. But at the same time the dough becomes less sticky, it becomes stronger and stronger, and more difficult to stretch out. So I think "ah, that's a good mix" and let it rest. But I haven't really given the gluten the stretches it needs.
So my final lesson is really the the most important one for me to remember me. I need to take my time when mixing and really give the dough a good stretch at the same time I'm folding and punching. Develop the gluten on the stretch out, as well as the fold in, if that makes sense.
I'll keep you posted on my progress. Please share your lessons in the comments!