This is the latest instalment of our Learning Loaf series. We've talked about ingredients, mixing, bulk fermentation and shaping. Now we're going to bake the loaf!
Now that your Learning Loaf is shaped, all the physical work is over. We only have three decisions left to make:
- Proofing: When should I put the loaves in the oven?
- Baking: When should I take them out of the oven?
- Cooling: When can we eat?
This post will answer all three questions and we'll answer them quickly. You're probably hungry!
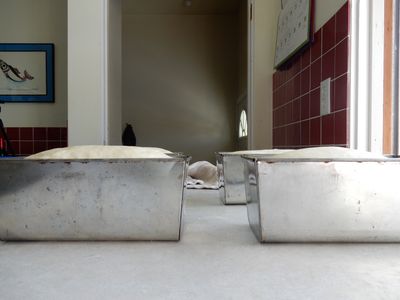
I see you peeking! Just a little bit longer
Proofing #
The newly shaped loaf needs to rise in the pan before placing in the oven. Fermentation is still happening, but bakers call this stage "proofing" to distinguish from the bulk fermentation stage. (Dough "ferments" in bulk; individual loaves "proof".)
We want to put the loaves in the oven when they have proofed into the sweet spot - not under proofed and not over proofed.
Judging the proof is important. Under proofed loaves are dense, gummy and difficult to digest. Severely under proofed loaves are, quite frankly, inedible. In contrast, over proofed loaves will come out of the oven saggy and pale. They might even deflate in the oven. Not awesome.
As the loaf proofs in the pan, it will continue to rise and rise, until the gluten finally breaks down and the loaf will deflate. Properly proofed dough is near, but still away from the maximum. Some bakers say the sweet spot is at 80% fully risen. 80% is the number I have in my head when I'm checking my loaves.
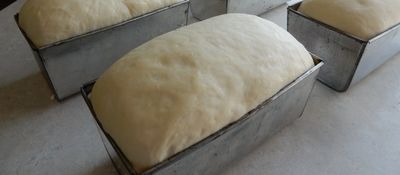
I poked this loaf three times to be sure. Time to bake!
The best way to check proofiness is with a gentle finger poke. Press the top of the loaf with your index finger and try to sense what is underneath the surface:
- Under proofed dough will spring back quickly and will feel dense underneath
- Just right dough will still spring back but will leave the indentation and feel light underneath
- Over proofed dough will not really spring back and will feel extremely fragile underneath. If you're scared it will deflate, it's close to over proofed.
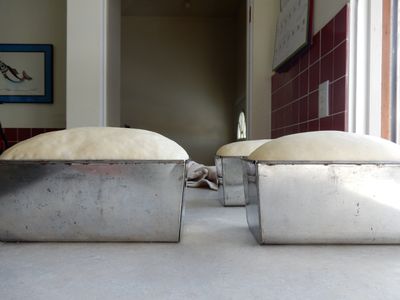
Judging by height is tricky. How much dough in the pan? How big is the pan? Better to give it a poke.
With pan bread, you can also look at how high the loaf has risen above the pan. With a 750g loaf and my mom's loaf pans, the proofed loaf rises just above the top of the pan.
But loaf height is a poor judge until you have your personal system grooved. More dough in a smaller loaf pan will look a lot different in an hour compared to less dough in a larger pan. Use your finger!
With our Learning Loaf, expect the loaf to proof for 1 hour to 1 hour and 15 minutes before baking.
Load the Oven #
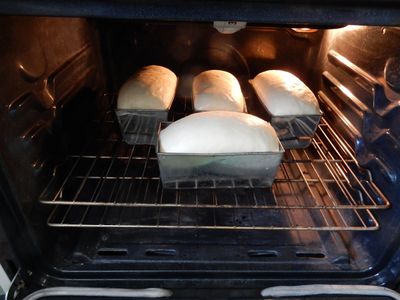
Loaves are in the oven and starting to spring
Preheat the oven to 400F / 205C while the loaf is proofing. I typically turn the oven on after the first 30 minutes of proofing.
Put the racks on the lower third of the oven.
When the loaf is proofed, place the loaves in the oven. Give them as much space as possible since the loaves will spring in the oven.
What Happens During Baking? #
Baking is actually the final and most active stage in fermentation. When loaf hits the hot oven, the yeast goes crazy and accelerates the rate of eating and dividing. The loaf rises and rises until finally, when the loaf reaches a temperature of 130F /54C and the yeast expires. This rapid rising is what we call oven spring.
Inside the loaf, the starches in the dough begin to gelatinize, forming the crumb. This begins in the oven but continues after the loaf comes out of the oven.
On the outside, the gluten continues to expand while the loaf springs, but it is also starting to set due the heat of the oven. There's a race going on between spring and crust setting; in a perfect world, the crust sets just as the loaf reaches maximum volume.
(This race is why we often add steam to baking chamber - to give the loaf more time to spring before the crust sets. We'll talk more about steam when we get to lean doughs in a future course.)
Finally, the loaf starts taking on a rich, golden brown colour. Sugars in the flour and the enrichments we added combine to give the loaf great colour and flavour.
When Should The Loaf Come Out? #
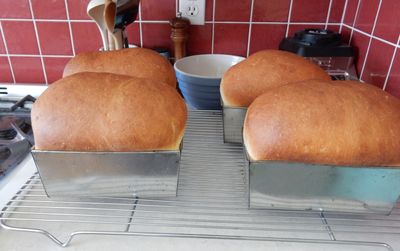
Nice and golden brown. Yum!
Bake the loaf for at least 30 - 35 minutes. The top of the loaf will be a deep golden brown. If you're concerned that the top is getting too dark, take the loaf out of the pan after 30 minutes and place the loaf back in the oven 'naked.' 5 more minutes and the sides will be nice and brown too.
**Don't under-bake your loaf! ** Good bread needs a full bake. Pan breads too. Under baked loaves are gummy and icky in the middle - not good eats.
At 750g, the Learning Loaf is a big loaf, so make sure you bake it all the way. For sure, keep it in the oven for the first 30 minutes and next time, leave it longer to see the difference.
Let Your Loaf Cool Before Eating #
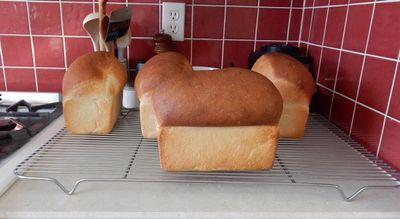
Must. Let. Them. Cool!
When the bread comes out of the oven for good, remove them from the pans as soon as you can and let them cool on a rack for at least one hour before slicing and eating.
Many bakers call Cooling the final step in the baking process and for good reason. The bread is still baking even when it comes out of the oven. The starch in the crumb continues to gelatinize and set. The crust is still setting up too.
Room temperature bread is easier to digest too, so let it sit!
You Did It! Way to Go! #
If you've followed along through the entire series, congratulations! You made your own awesome bread all by yourself.
Take a break and have a snack. You deserve it! May I suggest a peanut butter and jam sandwich?
In our next installment, I'll talk about common pitfalls and some variations you can try in your next rendition of the Learning Loaf.